When handling paper documents that have been scanned into PDF format, making changes or extracting text can be frustrating. Scanned PDFs are pictures of your files, so you can’t simply click, select, or edit them like standard PDFs. Fortunately, with the power of OCR (Optical Character Recognition), editing scanned PDFs is easier than ever.
What is OCR?
OCR stands for Optical Character Recognition. It’s a technology that converts images of text (like those found in scanned PDFs) into actual, editable, and searchable digital text. With the right kind of PDF editor, like Wise PDF Editor, you can turn even a photographed document into an editable file.
How to Determine If You Need to Apply OCR to Your PDF
If you can easily edit the PDF, like selecting a line of text to copy and paste it elsewhere, and the pasted text is properly formatted, meaning your PDF is OCR-optimized, you can start editing.
However, if any of the following happens, you need to perform OCR on your PDFs:
- Open the PDF and try to search for text within it. If no results are found or if the search function is disabled, it indicates the text is not recognized as text and is likely an image.
- Attempt to edit the text. If you can't select and edit the text, or if the text appears as an image element, it needs OCR.
- When you use screen reader technology to read, it indicates that the PDF is difficult to read.
Using Wise PDF Editor to OCR a PDF File
There are many PDF editing tools, like Wise PDF Editor, that have OCR capabilities, allowing you easily edit scanned PDFs with OCR.

Wise PDF Editor is a professional tool designed for easy PDF editing, including the powerful OCR feature, which allows you to convert scanned documents or image-based PDFs into editable and searchable files with just a few simple steps. Here’s how you can use it to OCR PDFs on your Windows 11 device.
Step 1. Get Wise PDF Editor
You can download and install Wise PDF Editor from here.
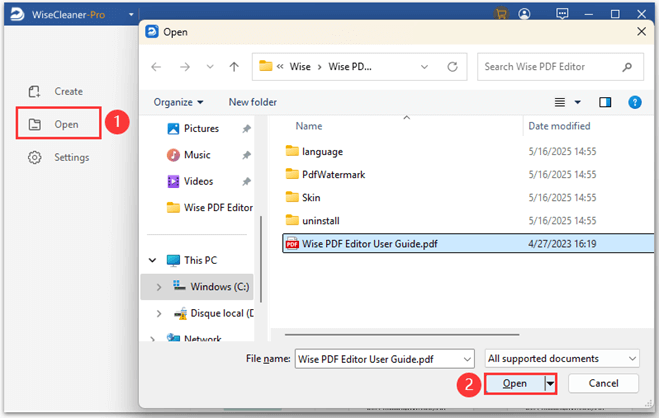
Step 2. Open Your Scanned PDF
On the Wise PDF Editor homepage, click Open on the upper left-hand side to upload your target scanned PDF.
Step 3. Perform OCR Process
Once your PDF is loaded, click the Home tab, then select the OCR option to start the conversion process. You can make some adjustments before executing:
- Select your desired output type, including Document with Text and Images, Text with Original Formatting, and Searchable Text and Images (non-editable).
- Customize the converting page range that you wish.
- Choose parts of the scanned PDF not to perform OCR.
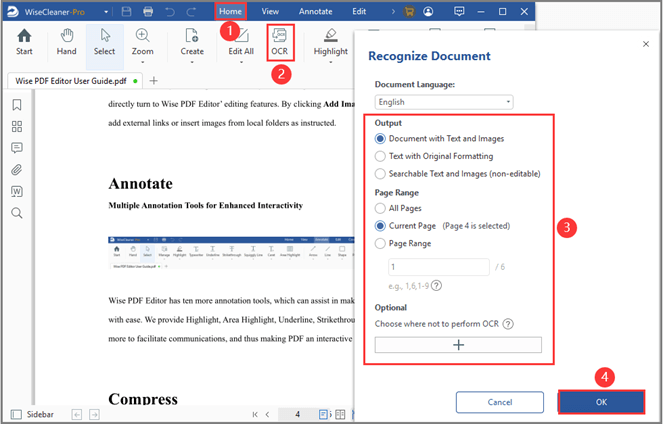
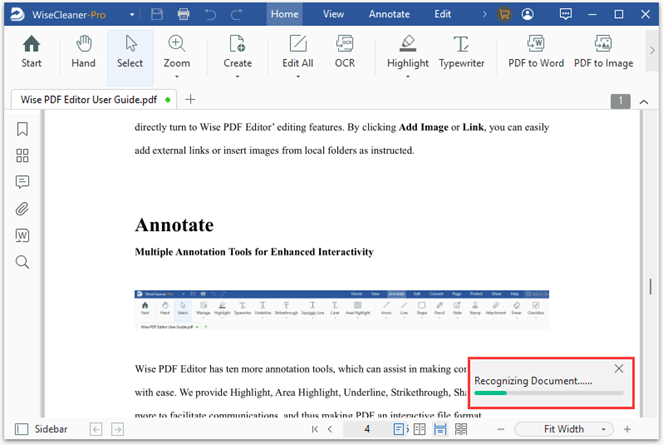
Once the setup is completed, click OK to get started. You’ll see a small Recognizing Document window showing the progress bar at the lower right corner.
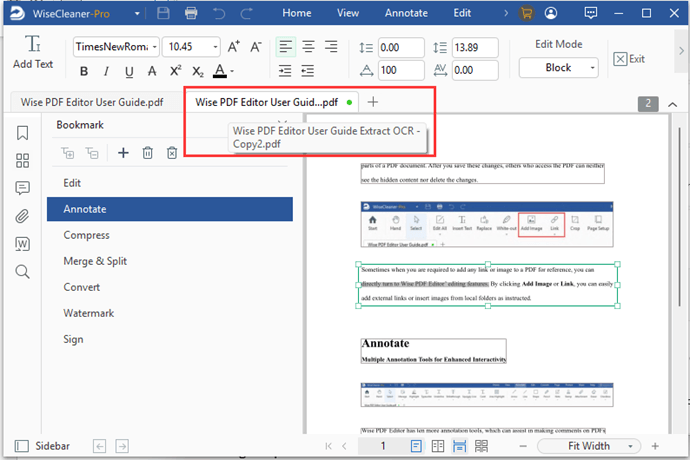
Step 4. Check the OCRed PDF File
Once OCR is complete, a copy file will be automatically opened in Wise PDF Editor. And now you can select, copy, and edit text within the document.
Step 5. Save & Export
After making edits, save your document. Consider exporting to different formats like Word (.docx), Excel (.xlsx), plain text (.txt), or back to PDF as needed.
Tips for Better Results
- Use high-quality scans for best OCR accuracy (ideally 300dpi or higher).
- If your PDF contains handwriting, OCR accuracy may drop, as most OCR technology works best on printed text.
- If you’re only doing basic text extraction, free tools or online converters might suffice. For complex layouts or frequent use, a dedicated PDF editor is ideal.
Conclusion
Wise PDF Editor makes it easy to turn scanned or image-based PDFs into editable and searchable files in Windows 11, thanks to its integrated OCR feature. Simply open your PDF, select OCR, choose the right options, and edit away.

