WiseCleaner Think Tank
Encounter difficult computer problems?
All about maintenance and optimization of your Windows System.
Dec 23, 2024
Windows SmartScreen is a security feature in Windows 11 designed to protect your PC from potentially harmful apps, files, and websites. While it's highly recommended to keep SmartScreen enabled for optimal security, some users may wish to disable it for specific purposes, such as troubleshooting or when using trusted sources. Here's a guide on how to enable or disable SmartScreen on Windows 11.
SmartScreen is a cloud-based feature that analyzes and filters content from the internet, warning you about suspicious files and websites. It checks downloaded files and apps against a constantly updated database of known threats. If it identifies a file or site as risky, SmartScreen notifies you before you proceed, helping to safeguard your system from potential harm.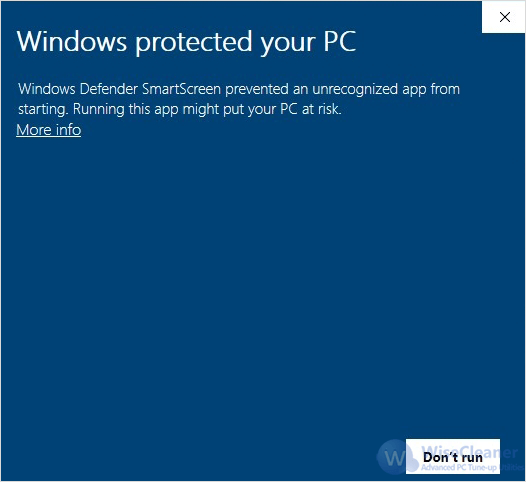
Here’s how you can enable or disable SmartScreen through the Windows Security app and using Group Policy or Registry Editor for advanced users.
The easiest way to enable or disable SmartScreen is use the Windows Settings. Here's how to do it.
1. Press Win + I to open Settings.
2. Navigate to Privacy & security > Windows Security > Open Windows Security.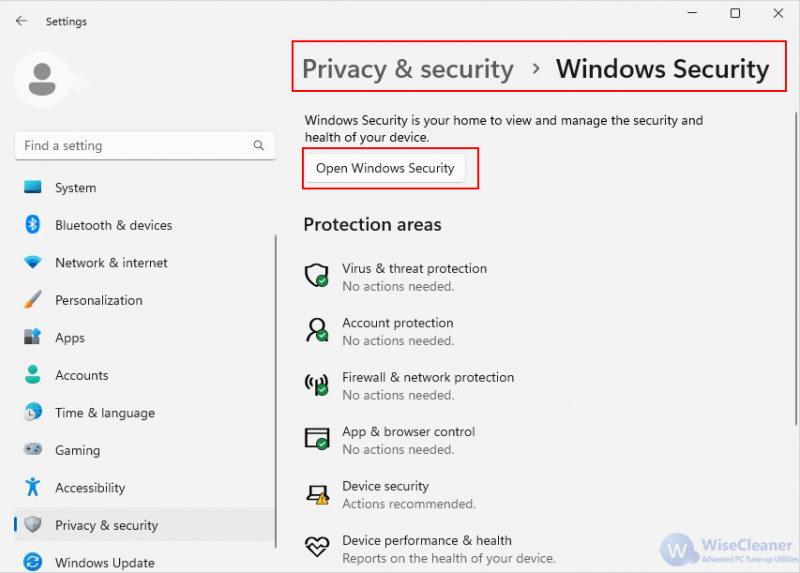
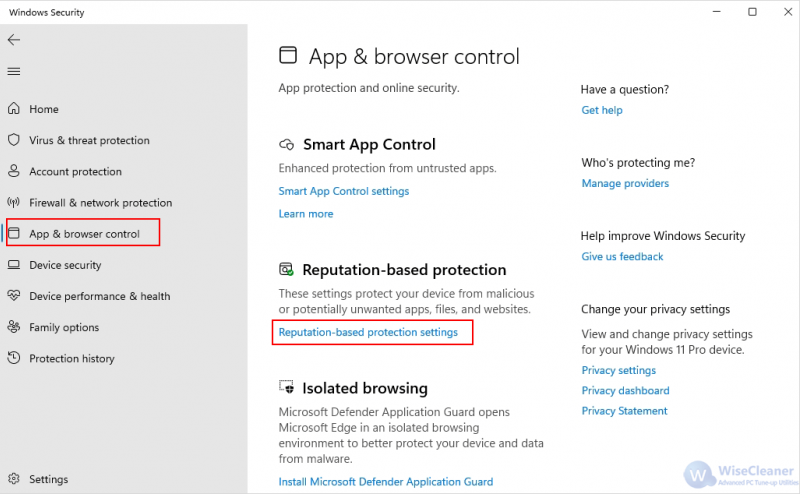
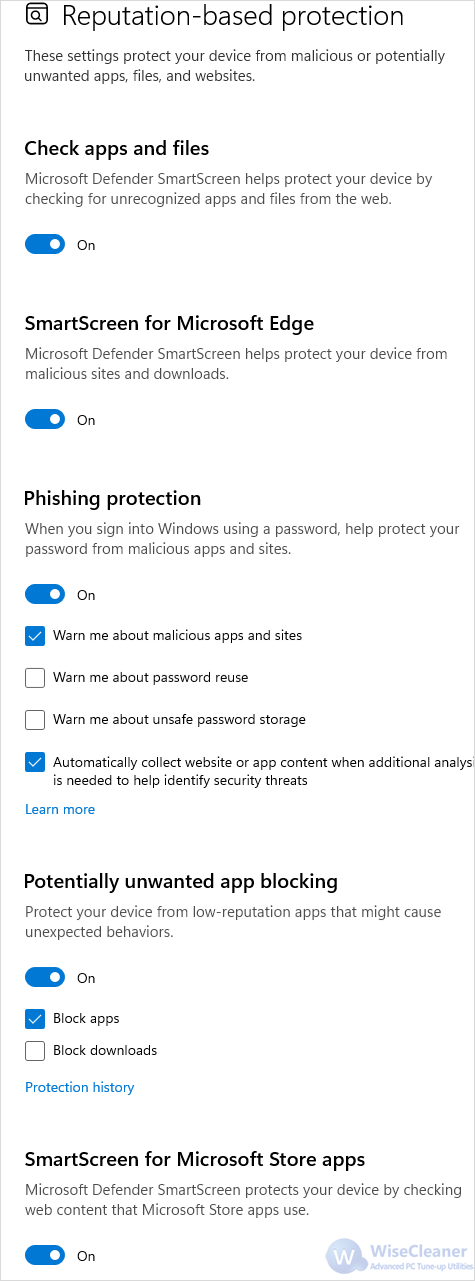
This method is suitable for advanced users or administrators managing multiple devices.
1. Press Win + R, type gpedit.msc, and press Enter.
2. Navigate to the following path:
Computer Configuration > Administrative Templates > Windows Components > File Explorer
3. In the right pane, Double-click Configure Windows Defender SmartScreen.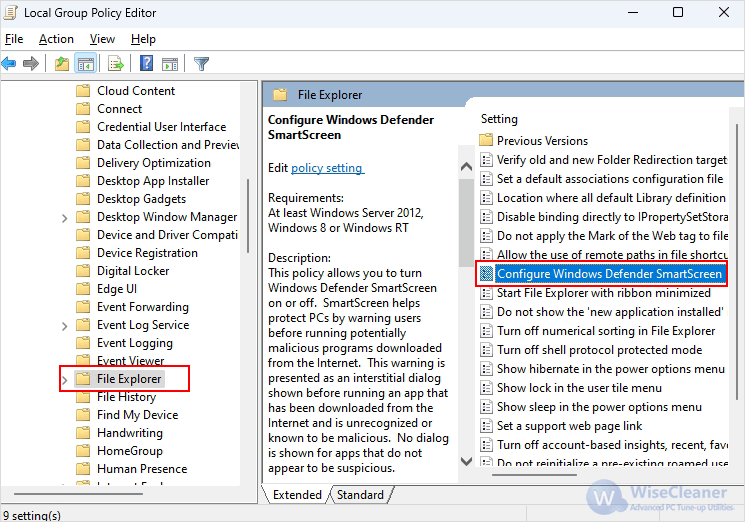
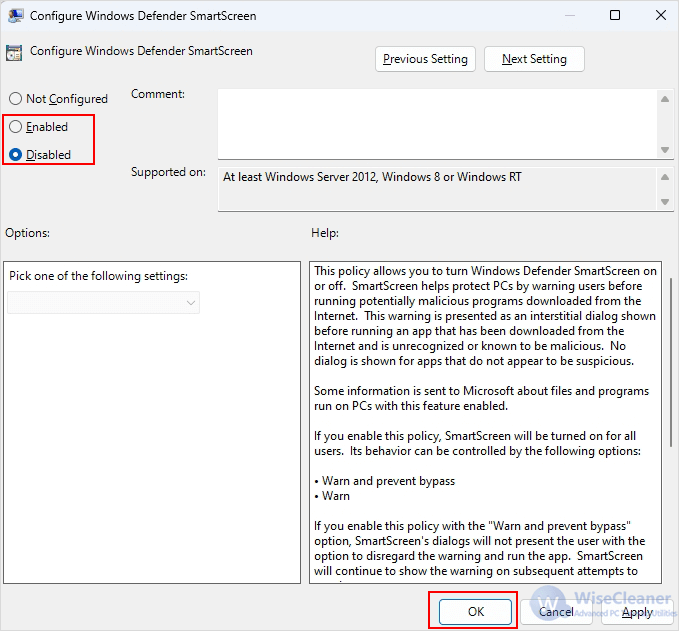
Another method to enable or disable SmartScreen is by editing the Windows Registry. Be cautious, as incorrect changes to the registry can cause system instability.
1. Press Win + R, type regedit, and press Enter.
2. Navigate to the following path:
HKEY_LOCAL_MACHINESOFTWAREPoliciesMicrosoftWindowsSystem
3. Right-click on the System key and select New > DWORD (32-bit) Value, and rename it as EnableSmartScreen.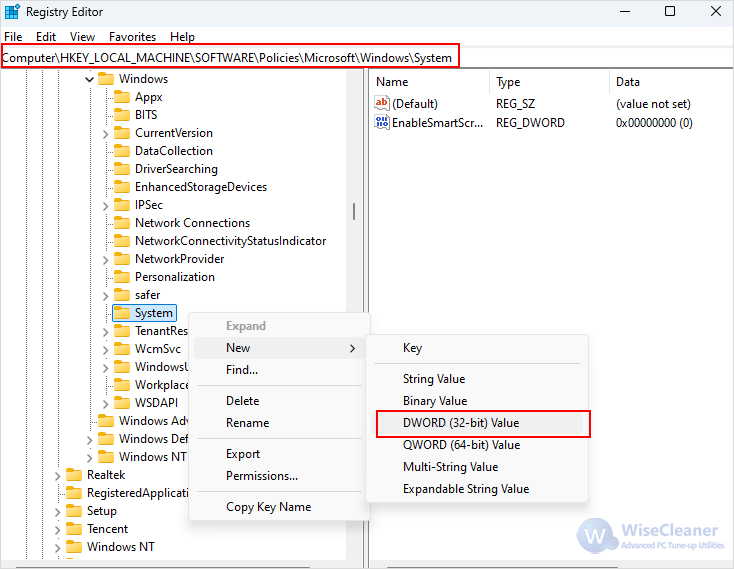
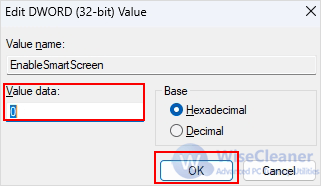
SmartScreen is a robust feature that enhances the security of Windows 11. Whether you need to enable or disable it, the methods outlined above will help you manage SmartScreen effectively. Always prioritize your system’s safety and re-enable SmartScreen after completing any tasks that required it to be turned off.
wisecleaner uses cookies to improve content and ensure you get the best experience on our website. Continue to browse our website agreeing to our privacy policy.
I Accept